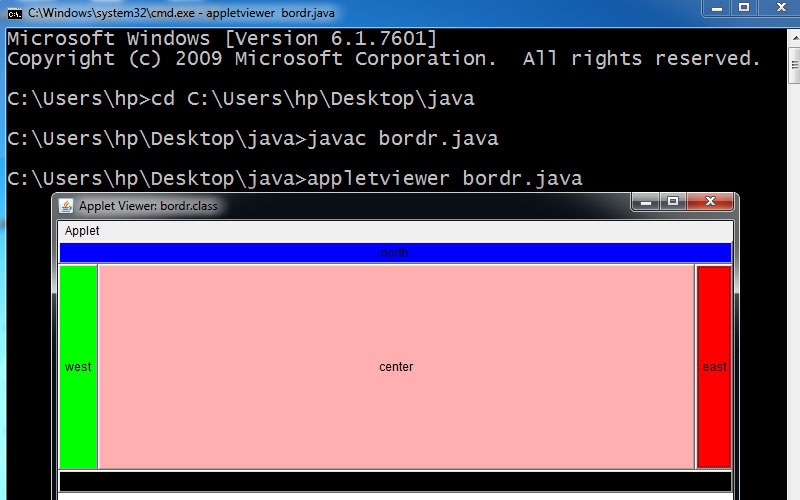
BorderLayout divides the container into five parts (directions),east,west,north,south,centre. By using this Layout we can place AWT components in each part (different location).
BORDER LAYOUT IN JAVA EXAMPLE
import java.awt.*;
import java.applet.*;
public class bordr extends Applet
{
Button b1,b2,b3,b4,b5;
public void init()
{
b1=new Button(“east”);
b1.setBackground(Color.RED);
b2=new Button(“west”);
b2.setBackground(Color.GREEN);
b3=new Button(“south”);
b3.setBackground(Color.BLACK);
b4=new Button(“north”);
b4.setBackground(Color.BLUE);
b5=new Button(“center”);
b5.setBackground(Color.PINK);
setLayout(new BorderLayout());
add(b1,BorderLayout.EAST);
add(b2,BorderLayout.WEST);
add(b3,BorderLayout.SOUTH);
add(b4,BorderLayout.NORTH);
add(b5,BorderLayout.CENTER);
}}
/*<applet code=”bordr.class” height=300 width=300></applet>*/

Explanation….
In the above example, we create five Buttons controls for the five regions: EAST, WEST, NORTH, SOUTH, and CENTRE. Add() is used for adding the components in BorderLayout.

